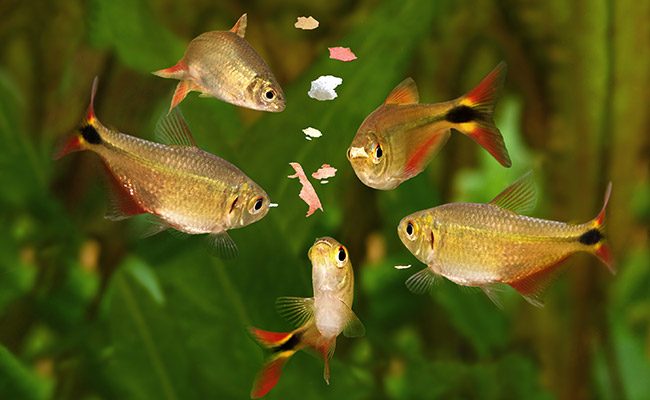
Fish are a much-desired pet with low maintenance and low cost. Depending on the species of fish you own, the best fish foods for automatic feeders usually consist of inexpensive flakes, pellets, or powder that are dropped into the aquarium. As a result, fish typically require one to three feedings per day. If you are often busy with work, the automatic fish feeder can do the feeding for you. But how to install an automatic fish feeder, let's find out below!
The installation automatic fish feeder is mounted inside the aquarium and can be programmed to dispense food at designated times. From there, it can be added to an existing aquarium without having to remove your fish. Read the instructions below!
1. How To Install An Automatic Fish Feeder
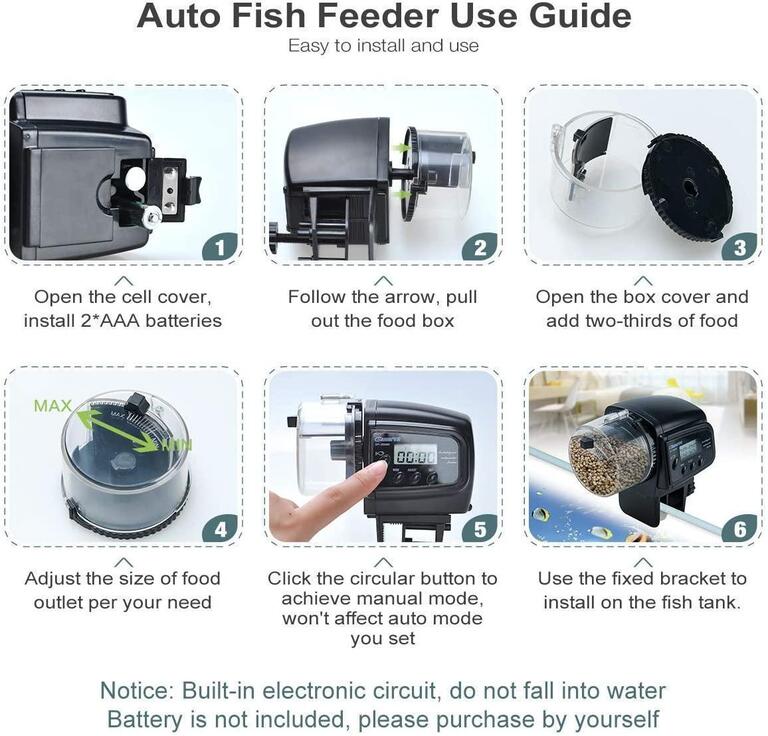
Step 1: Insert the battery
Removing/installing the battery cover on the fish feeder and installing the required batteries are specified in the owner's manual. Place the battery cover back into the fish feeder.
Step 2: Add the best fish food to the automatic feeder
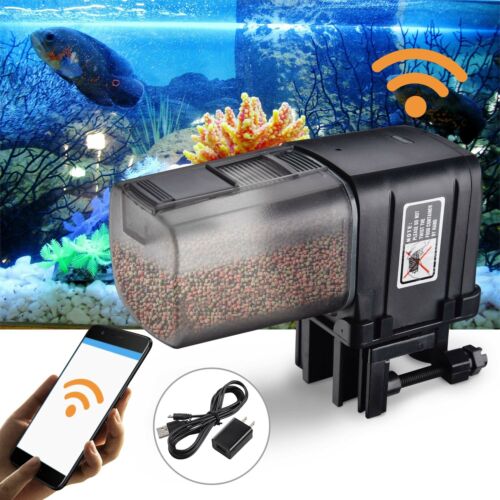
Slide the hopper out of the fish feeder and fill it with dry food, powder, or pellets. Most fish feeders include a funnel, which is a container for food. The typical residual hopper can hold enough food to feed several small fish for four months at a time. Fill the funnel with enough food for four months. Slide the hopper back and close the dispenser door into the feeder.
Step 3: Switch installations
You should adjust the amount of feeding. Adjust the door setting to the desired delivery amount. As with some AquaChef automatic fish feeders, it is necessary to press the "Manual" button to determine how much food will be dispensed in a single feeding. Open the door to provide more food if needed, then close the door when the desired amount of food is added. In general, aquarium fish usually need to be fed one to three times per day.
Step 4: Set up the automatic feeder
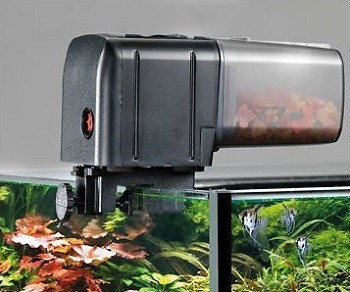
Then attach the feeder to the aquarium using the brackets provided. Screw the bracket onto the top of the aquarium. Insert the base of the feeder into the rack and adjust the feeder so that the food is automatically dispensed into the aquarium. If the feeder cannot be attached to the brackets, use double-sided tape to attach the feeder to the inside glass of the aquarium. Make sure you are mounting the feeder above the water line so that the device does not get wet and fall into the water.
Step 5: Set feeding time
Thanks to the timer programming. Press the "Set" button or a similar button to set the feeding time. Switch the button to change the timer to the desired feeding time. Always be sure to check the product manual for further instructions as there may be some slight differences between the Top Fin Automatic Feeder instructions and the Imagitarium Pro Automatic Fish Feeder instructions.
2. How is the automatic fish feeder?
They will be placed on the side or top of the tank, stocking at intervals and portion sizes that you decide.
Usually, they have three main parts: a hopper, a timer, and some method for setting portion sizes and intervals.
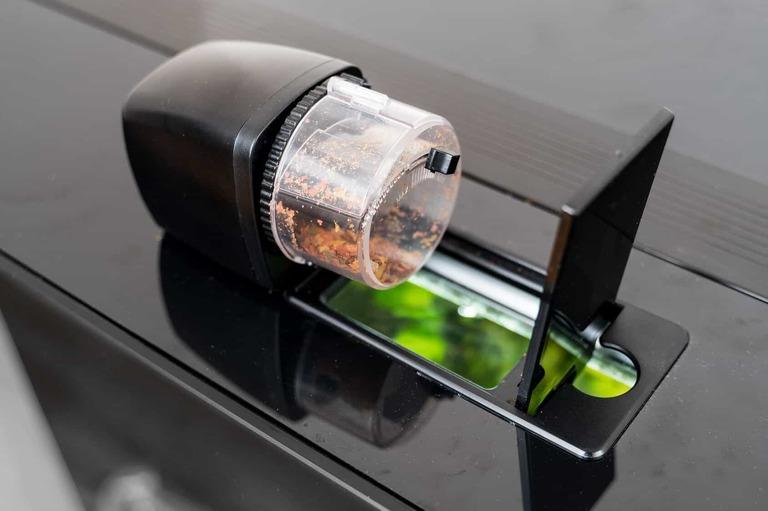
The hopper is the food container, you fill it with food that will gradually be taken out. Time to rotate the hopper, dispensing fish food in the process. They will operate powered by batteries or a power cord, depending on the model you purchase.
Furthermore, the devices will have suction cups to place on the inside wall of the aquarium, some other devices will have a mount that hooks through the wall of the tank.
There are also certain models with a 'feed now' button. It drops food into the tank outside the programmed time. So it is also very convenient to check if the loader is working without waiting for the programmed period.
Nowadays, some new designs are making it possible for chargers to be controlled from the phone as well.
Therefore, you only need to maintain them, cleaning the equipment as you clean the tank. Replace the food as well, and make sure everything is dry to prevent spoilage.
However, with automatic feeders, you can use dry food in the feeder. If fish prefer live or frozen food (like bloodworms), perhaps switch to freeze-dried food.
3. How to select an automatic fish feeder easily?
Rotating barrel fish machine
This one is the simplest and most popular. During operation, the barrel rotates and releases the food into the barrel. The amount of feed discharged is determined by the size of the hole in the barrel, but you have control over the size of the hole.
This part of the feeder can hold the most food, it's perfect for people traveling for long periods - can hold up to 6 weeks of food.
However, it only has one compartment which can cause problems for community aquariums. Therefore, you can pour a variety of foods into the bin but cannot be sure that the distribution is uniform like you can mix flakes and pellets. Then more detritus than pellets are produced and fish living at the bottom can then be starved of food.
Large dry fish foods should be avoided - plates and sticks containing algae can block the opening of the bin.
Rotating big barrel fish machine
This type can have great control over the amount of feed entering the tank with these feeding trays.
Along with the circular arrangement of the trays. You should fill each tray with food one at a time, then set the timer. At the time of feeding, the entire contents of a tray are emptied into the tank.
Measure each meal and mix different foods to make sure everyone gets the amount of food they need. So ideal for large aquariums. Also, portion control feeders are small in size, so you can't be out for long. Most models have 10-14 compartments that can hold food for 10-14 days.
4. Type of fish food
Whether you use pellets, powders, or flakes to feed your fish, it can be problematic to use your favorite food in the feeder. Like when Fish Mate F14, although there was no problem when dropping pellets, it got clogged when full of pieces. Fish food often has more problems with scales than other types, and you can experiment with a different fish food if you plan to use a feeder. However, most problems occur when the flakes get wet and clog, and humidity can be reduced with air ducts and fans.
5. Condensation problem
Usually, automatic feeders are placed a few inches above the water level and some brands have moisture problems humidifying the food supply. Although the feeders are covered with plastic caps and have air vents, condensation usually finds its way into the tank after a few days. Fan dehumidifiers can reduce moisture in the feeder, but there is still a gap at the top of the food compartment that also reduces moisture. This can solve the condensation problem but leaves less food for the fish if you're away for a few weeks.
6. Modify the feeder
There are now adjustable portion control feeders available, but even at the lowest setting, the quantity is too much for your fish. You can adjust the opening with waterproof tape, as many unhappy customers have done, but will have to be checked periodically to be safe. The waterproof tape will work better than masking tape, but it will wear out and lose adhesion as it is closer to the water level.
7. Contingency plan when using fish automat
You should have a backup for some cases when you are away from home, the battery-powered automatic feeding machine will meet this need.
However, the water pump will stop working if there is no backup. However, still check the patrol to make sure there is no blockage in the chamber or the timer is not working properly, which could result in loss of fish food or excessive discharge of matter into the water.
Conclusions
Through the above, you probably know that the automatic fish feeder is an extremely useful tool for any fish owner, for busy people.
Along with other great equipment automatic fish, feeders are devices that are surprisingly versatile and versatile. There are still models for every type of fish food, and some can hold one or more types for indoor family aquariums, there are also larger and tougher outdoor models specifically for koi ponds.


