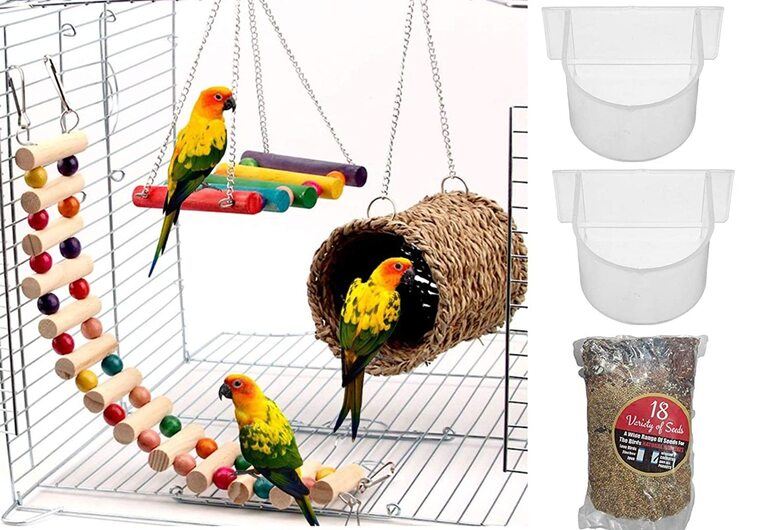
If you know how to make ladders for birds then this is a very handy skill. As they are not only practical in outdoor activities such as boating and hiking, but they are also fun to climb. Additionally, knowing how to make a ladder can be used as an emergency resource when a traditional ladder is unavailable, impractical, or difficult to use.
First, we come to the basic single wire rod making:
1. Making the simple single rope ladder

- Step 1: Lay a long rope down on a flat surface and make a "U" shape. You grab the rope at the right end of the "U" and slide your hand down the rope to measure out 1 foot (30 cm) of rope.
- Step 2: Position the rope between your hands in an "S" shape. Then, use your hands together to press the letter "S" down horizontally.
- Step 3: Make the first rung of the ladder by taking the left end of the rope and threading it through the first, left end of the "S. Continue to bring the end of the rope along the bottom curve, wrapping it around the "S" four times. By threading the end of the rope through the second, bend to the right of the "S" to secure the lanyard and complete the first notch.
- Step 4: Repeat this as many times as you need to create the rope ladder to the desired length.
2. Make a rope ladder out of wooden ropes
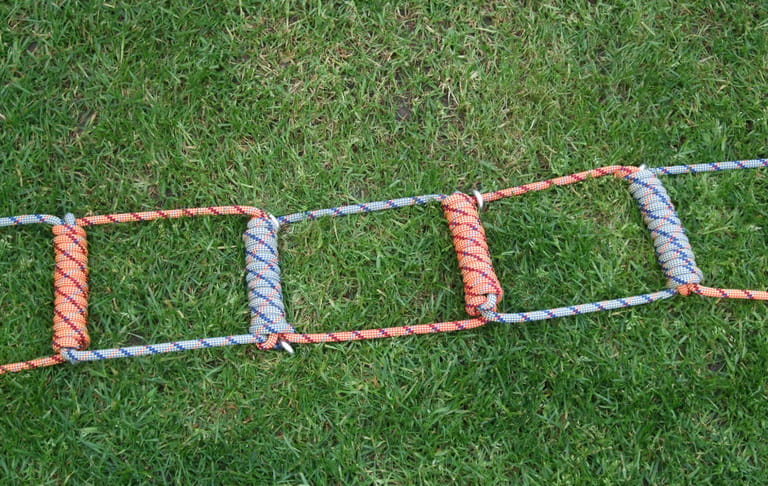
- Step 1: You need to prepare two lengths of rope by tying or melting them at the ends. This prevents the freshly cut rope from fraying or coming apart. Fix the ends of a rope called kumquat. Take some twine and run it along the length of the rope until it almost reaches the end of the rope.
Then double again when the length of the twine is about one and a half times the diameter of the rope. The twine will form an upside-down "U" shape.
Continue wrapping the twine tightly along with the "U" shape and thread the end of the twine through the loop at the top. Now, pull both ends of the twine until the loop is pulled underneath the whip.
Then, trim the ends of the twine so they don't stick out and the whip looks neat. Natural fiber should be used when spinning natural yarn because it will be less likely to come off. And if you're using a synthetic rope, wrap the ends with some duct tape, then heat them over an open flame.
- Step 2: In this step, you need to lay the rope flat on the ground and make an overhand loop about 15 inches from the top end of the rope.
If doing an overhand loop, take the working end of the rope and place it on the stand. This loop is the starting step of forming the button that will hold the first wooden ladder.
Finally, the work of the rope is the part of the rope that is actively being used to form a knot. The vertical part of the rope is the part of the rope that is not actively used to form a knot. This is all of the rope in the opposite direction of the working end.
- Step 3: Pull the stand over the top ring. It needs to thread its fingers through the underside of the loop and grab the stand. At this point, pull the stand over the overhead loop. And it will form a new loop.
- Step 4: Insert a wooden ladder into the new loop formed by the stand and tighten the rope. Move the ladder into the desired position and tighten the rope. The result button should be visible at the top and bottom of the ladder.
Most of the time, the ladder should be pretty secure at this point, but tying an over-knot underneath it greatly reduces the chance of the ladder moving down the rope. To tie a knot on top, do an overhand loop, then over the working end, then through the loop. Make sure the overhand knot is directly below the step support knot.
- Step 5: Just repeat the process on the remaining length of the rope. Take care to ensure that the rungs are even. Crooked steps will increase your chances of falling.
- Step 6: Begin the next arm rotation anywhere 9 to 15 inches from the previous wooden step. Arrange the steps uniformly and in a way that allows for a comfortable climb. Continue adding ladders until the ladder reaches the desired length.
- Step 7: Hold the ladder firmly at the top.
This means using a wooden stick or a rolling pin. To tie a wooden stick, wrap the working end around the pole or branch you want to attach the ladder to all the way around at once.
Cut across the work on the stand and continue to wrap the workhead around the column at least two more times. Then, stretch the rope to tighten it. Also, if the bank needs more grip, wrap the working head around the stand a few more times. Since a wooden stick is ideal for attaching a rope ladder because the greater the pull force exerted on the knot, the tighter it will be.
And when tying the spool, take the other end of the rope and wrap it completely around the stake at least three times. You take the working end and place it on the stand. At this point, you wrap the wire around the stake on the other side of the stand a couple of times.
You also need to insert the working end under the piece of wire that goes over the stand and pull it tight. Since the roller bar resists horizontal traction very well, this is ideal if you are attaching the ladder to horizontal stakes or poles. For wood pulling, if more grip is needed, wrap the working end around the post a few more times.
- Step 8: You need to hold the ladder firmly at the bottom. This is also optional, but keeping the ladder on the ground will significantly increase stability and make climbing easier. If you are going to fix the ladder to the ground, leave enough rope to do so; 15 inches or more would be more appropriate. Wrap each leg of your ladder to the stake at a 45-degree angle and secure it with a roller.
3. Making wood ladders for birds
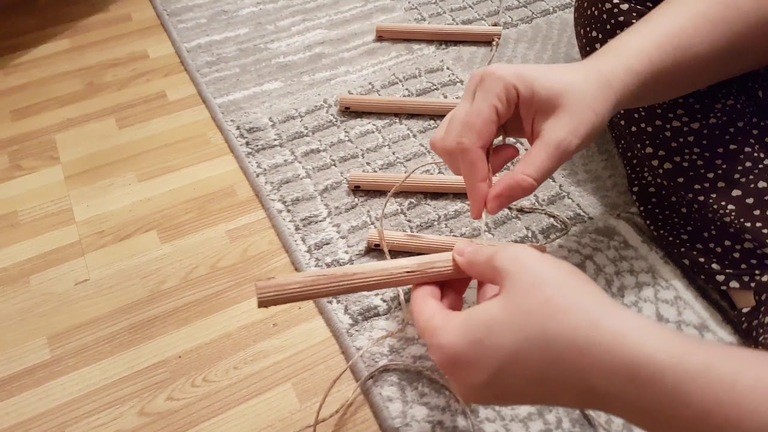
Step 1: Material
You need to prepare for include:
- Non-toxic glue
- 4 BBQ sticks (size: 9 × 4 × 365mm)
- Pencil
- Cutter
Step 2: Making
Take 2 BBQ sticks and cut the pointed part with a precision knife and do the same with the second stick.
Step 3: take the remaining 2 sticks and cut each stick into 4 equal parts so that you will have 8 equal parts, use a precision knife and a pencil.
Step 4: Then, divide the first 2 sticks into 8 equal parts, each without cutting them, and mark the lines. Stick the 8 parts of the second 2 sticks to the lines.
Step 5: After gluing the sticks, let the glue dry.
Conclusion
Knowing how to make a stick for your bird will give you a creative alternative and give your parrot more room to thrive. Above we have shared how to make rope ladders and wooden ladders in simple steps. This will help you with how to make a ladder for bids.


